 AI Assistant Tutorial
This tutorial introduces how to use the AI assistant in RuleGo-Editor to quickly create, modify, and deploy rule chains through conversation.
# Prerequisites
- RuleGo-Server is running (see Installation and Deployment)
- LLM connection information is configured in
config.conf:
[global]
llm_url = https://open.bigmodel.cn/api/coding/paas/v4
llm_api_key = your_api_key
llm_model = glm-5.1
2
3
4
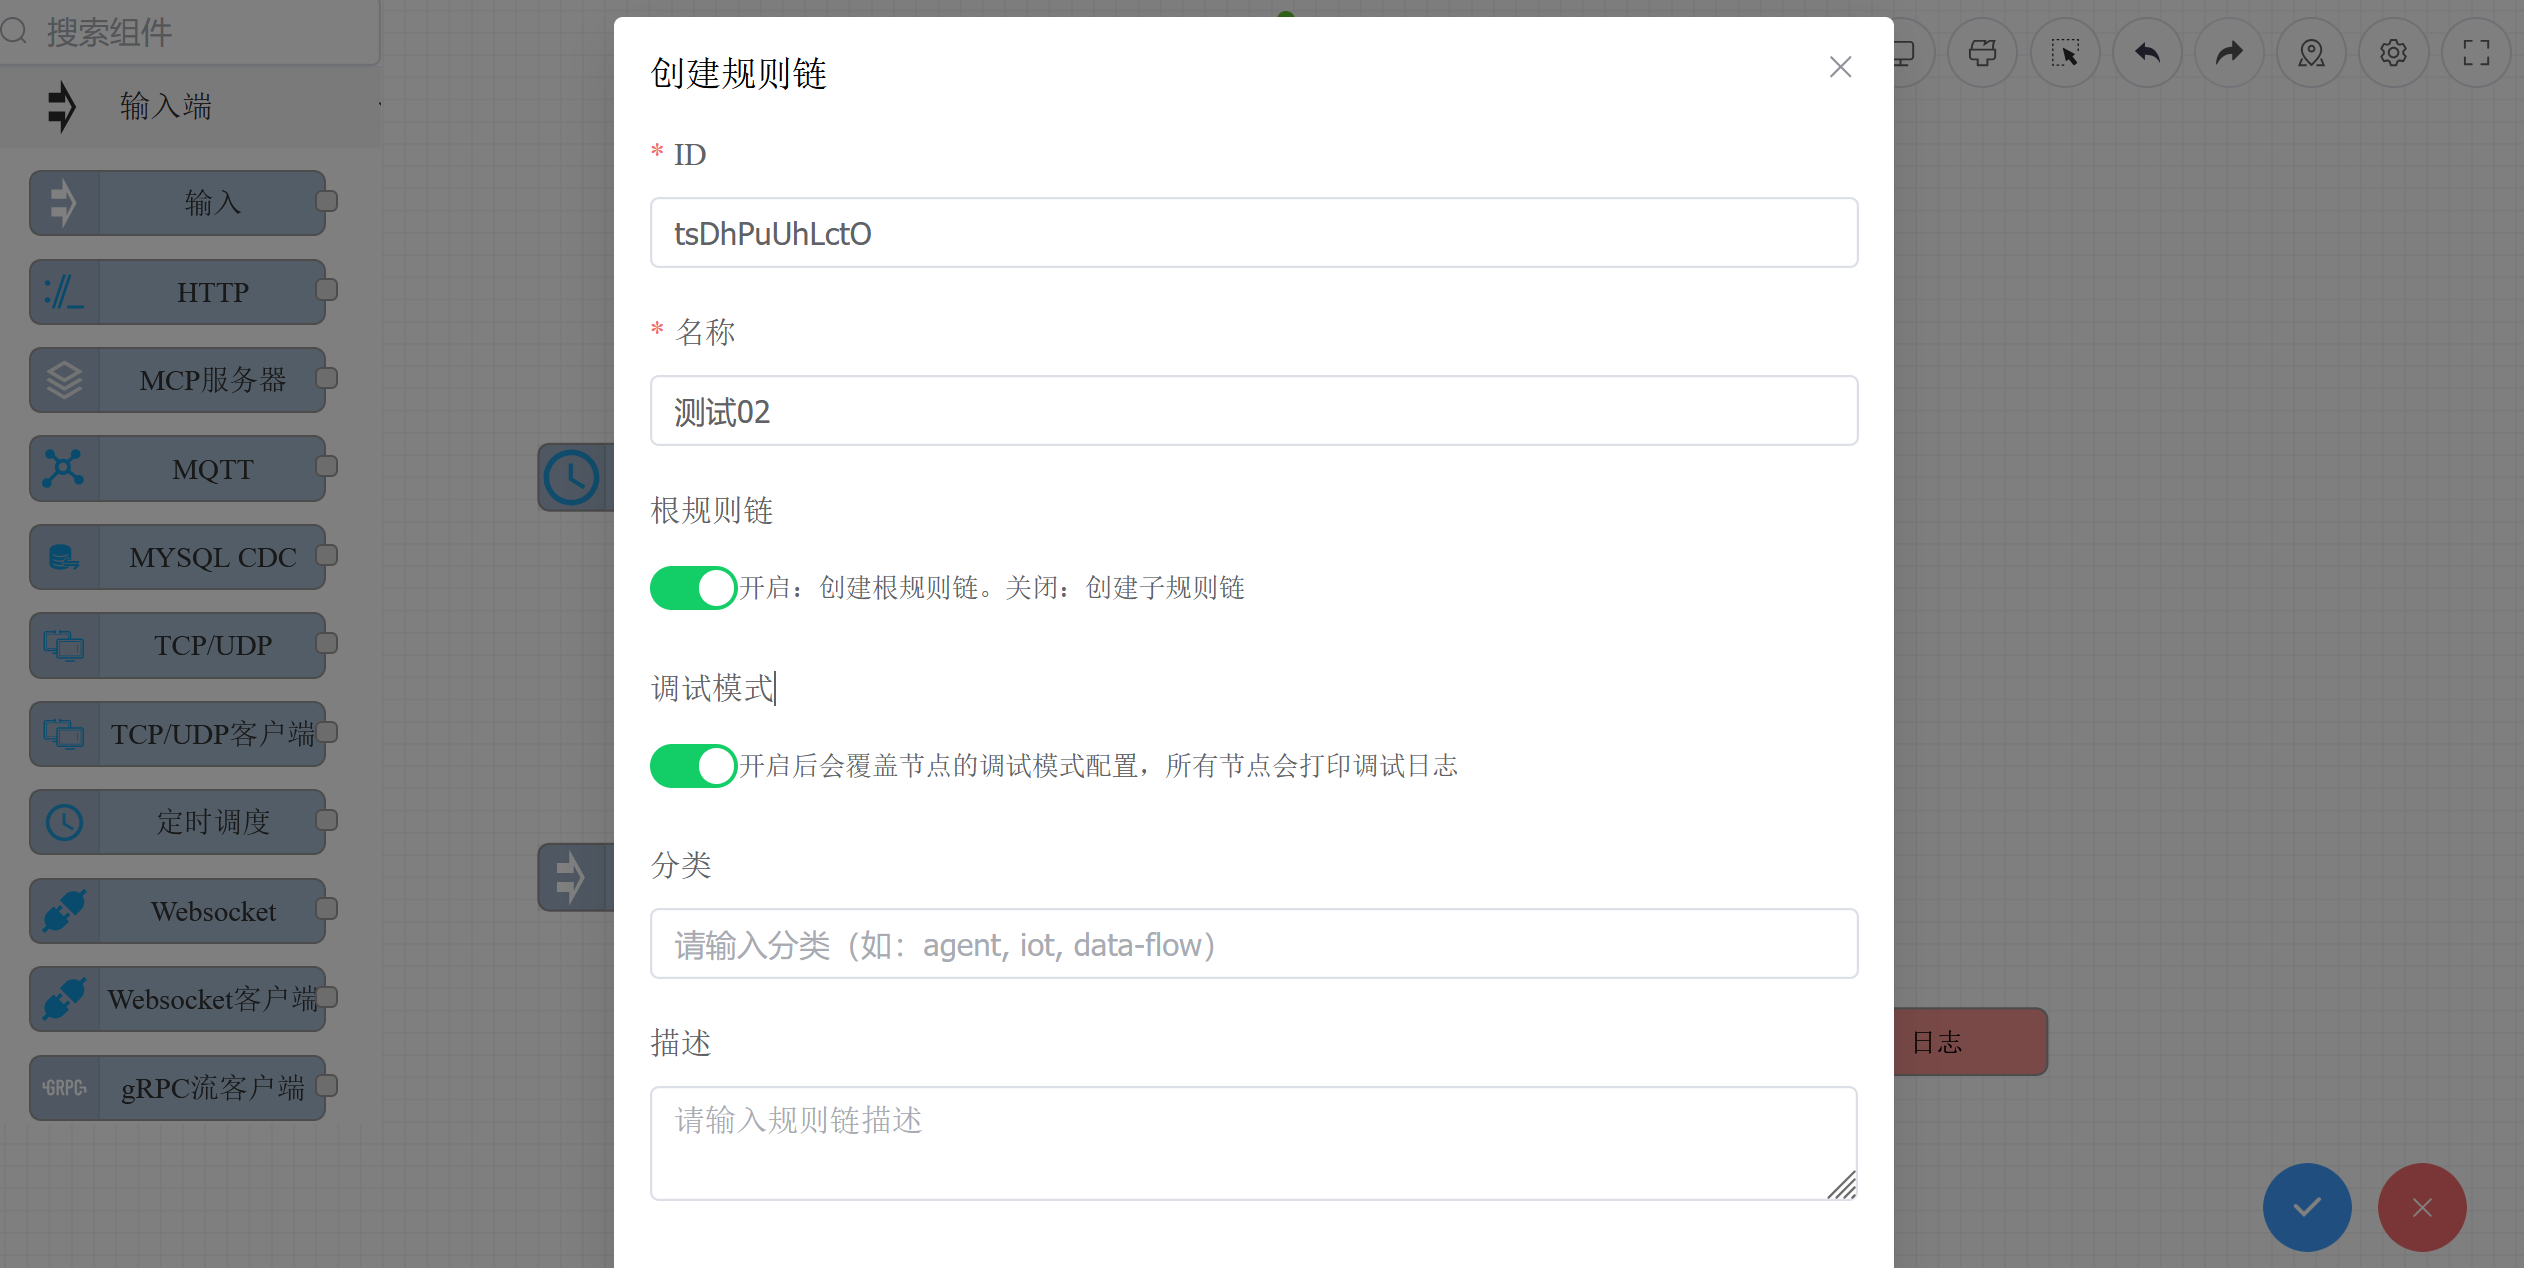
# Step 1: Create a Blank Rule Chain
Open the editor and click the New button on the toolbar to create a blank rule chain.
# Step 2: Open the AI Assistant
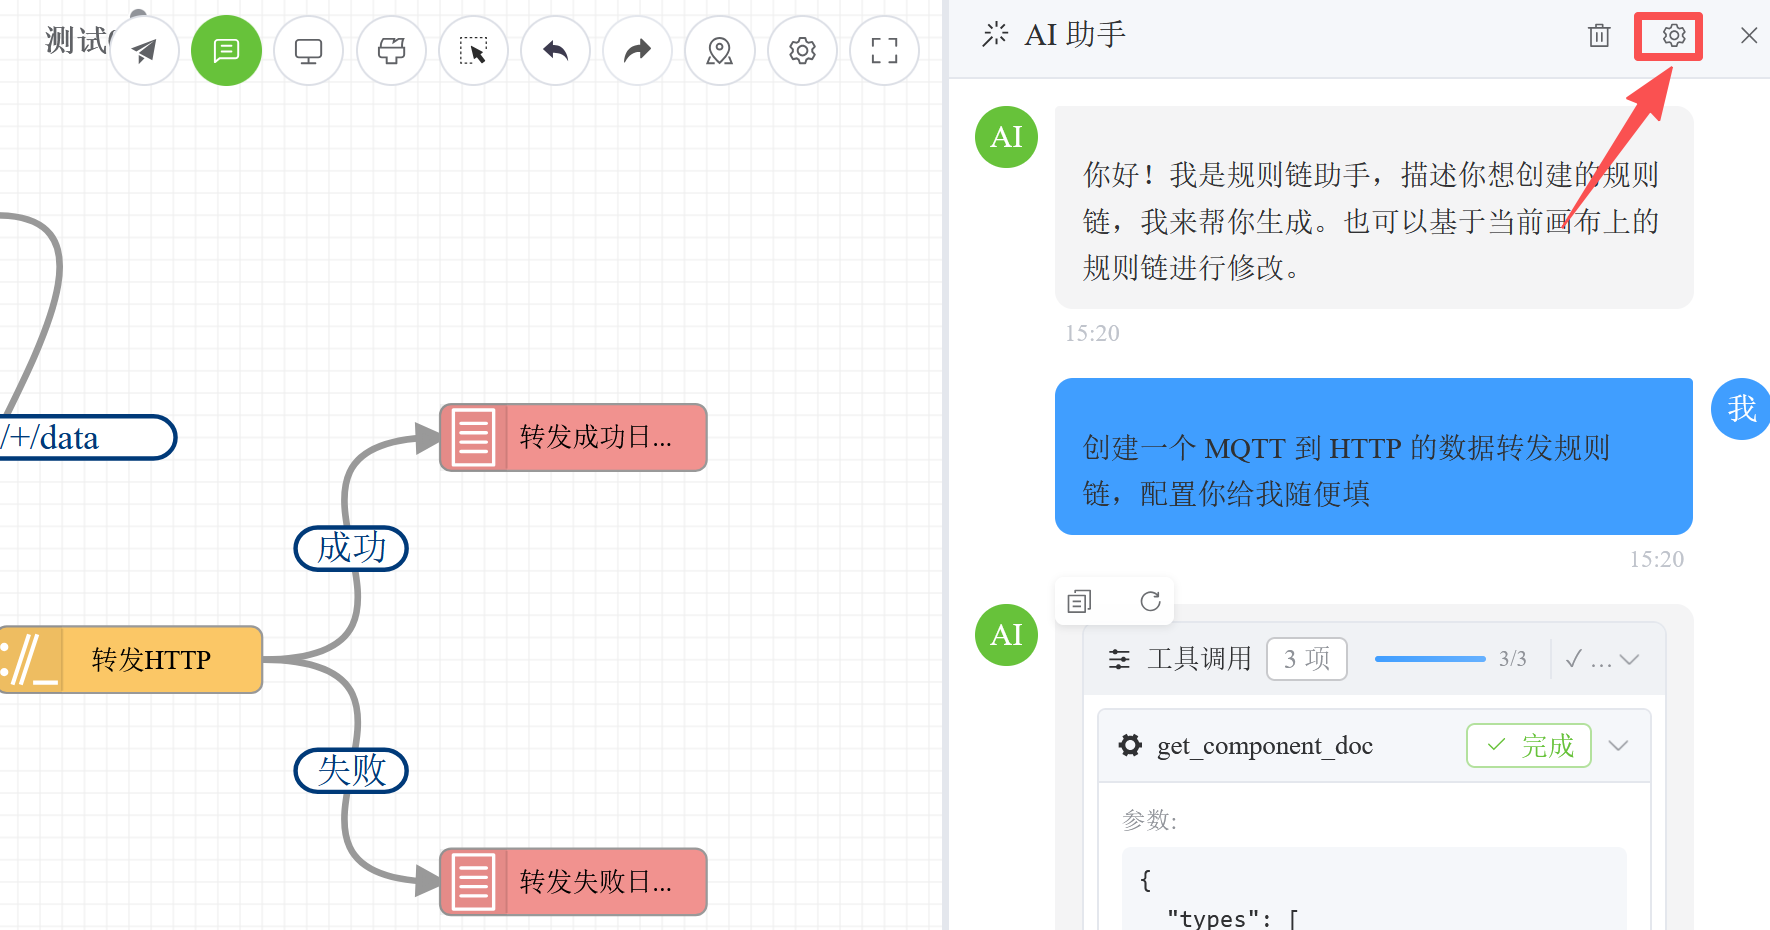
Click the AI assistant icon in the right toolbar to open the AI assistant panel.
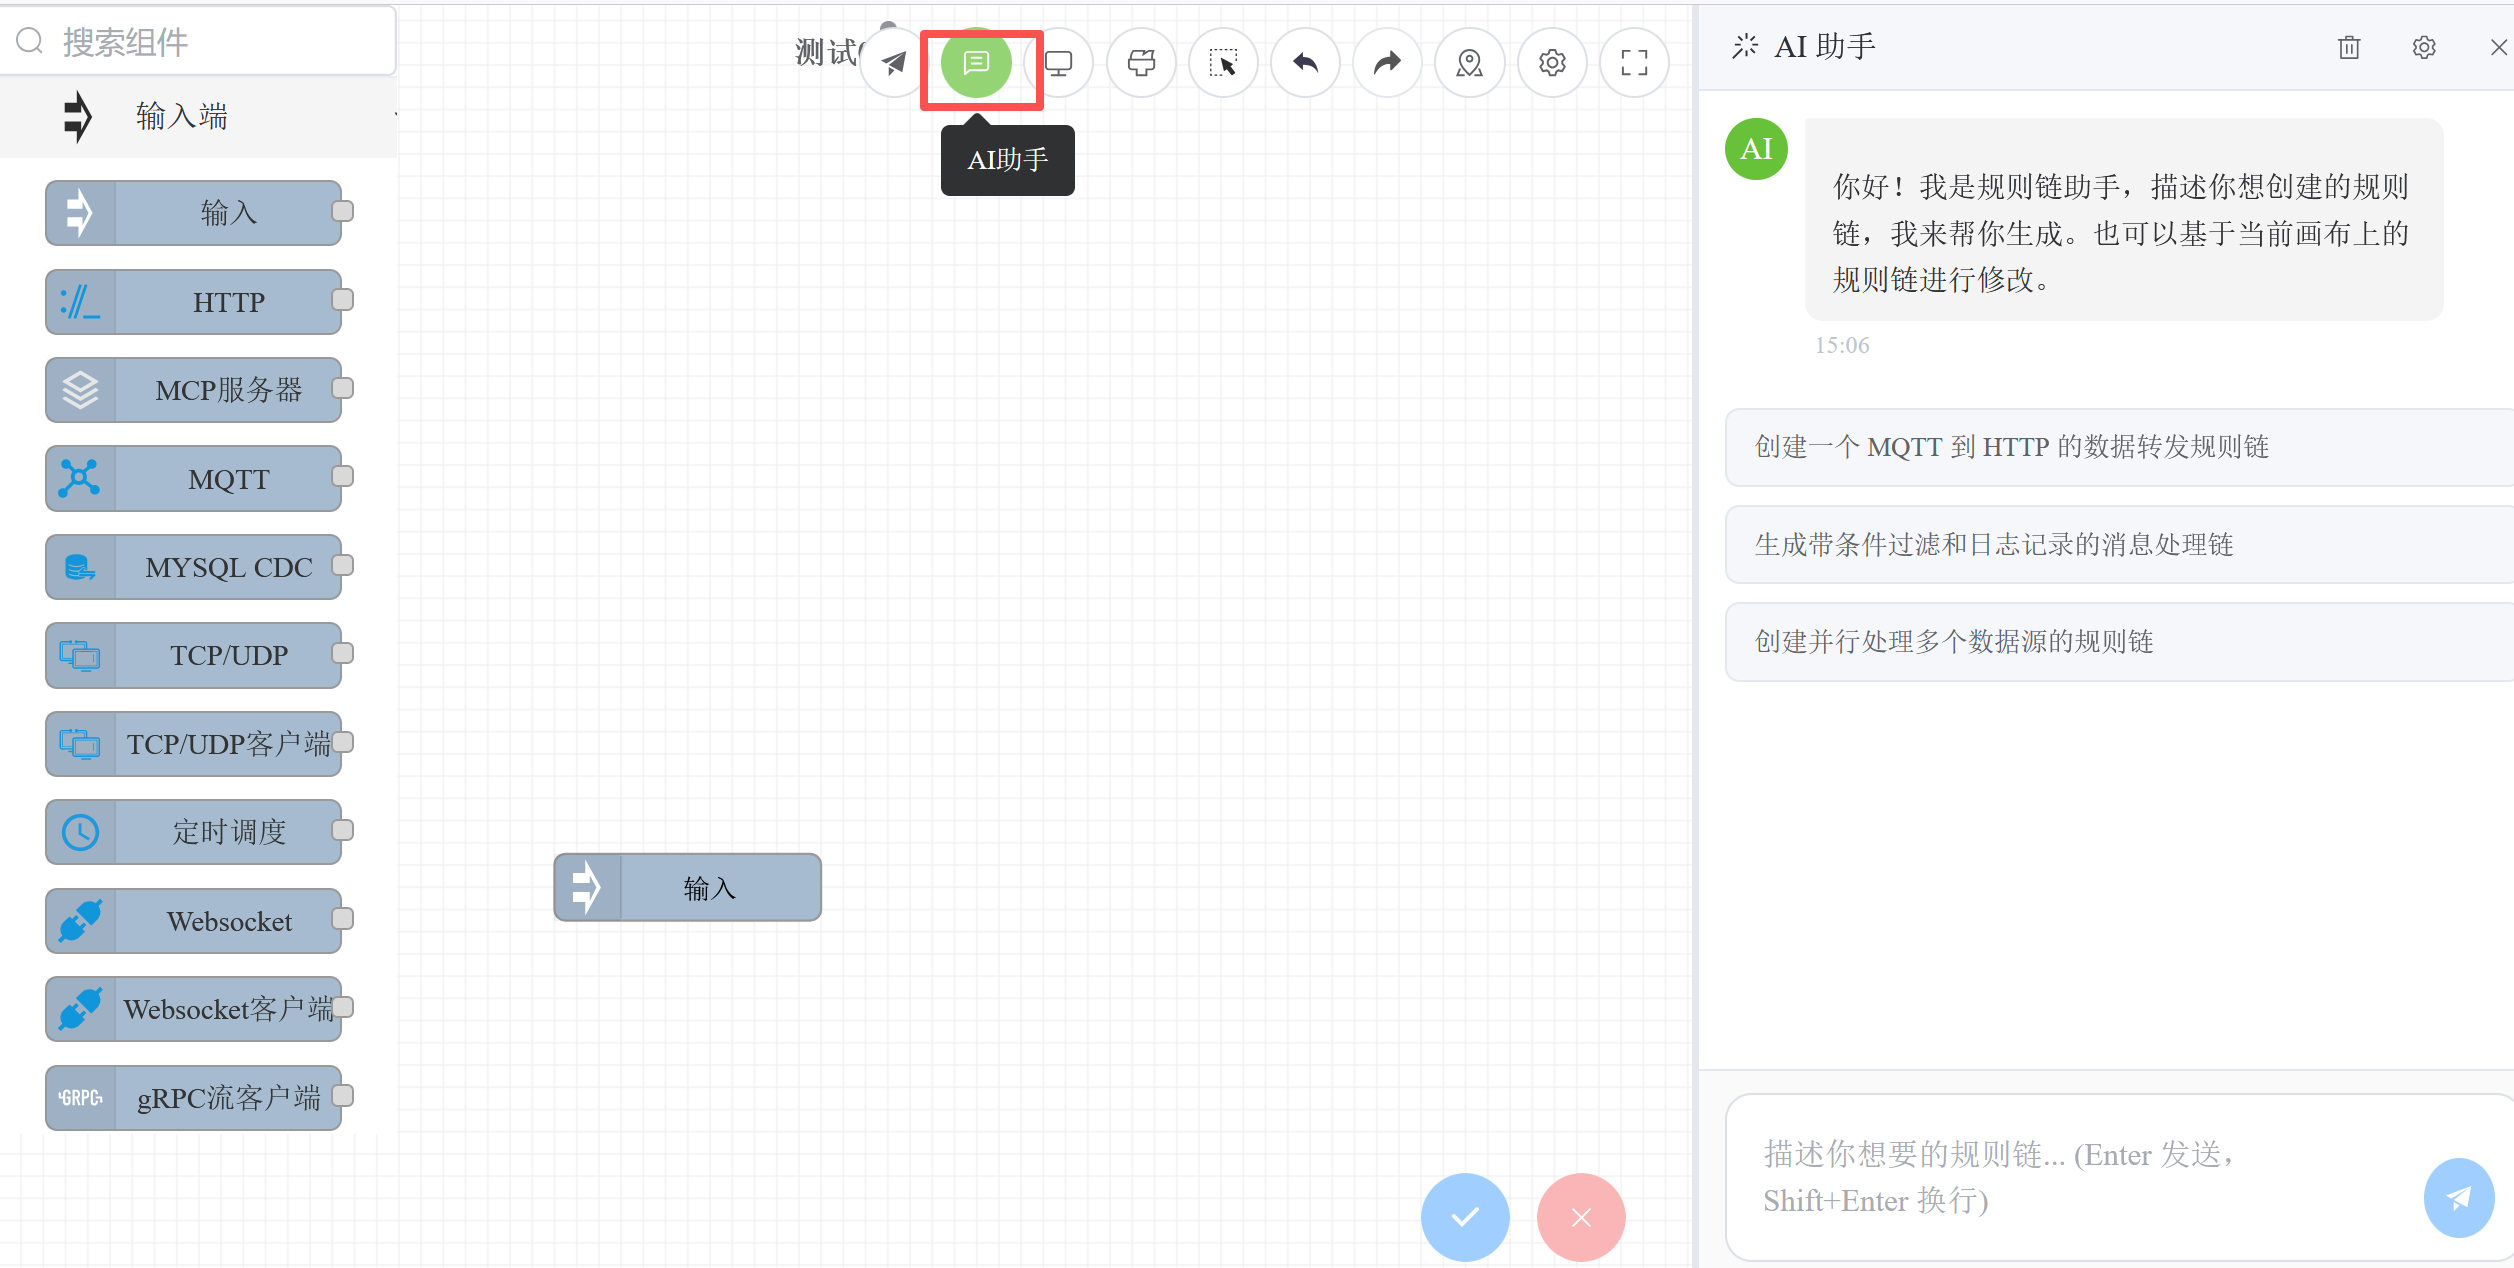
# Step 3: Generate Rule Chain via Conversation
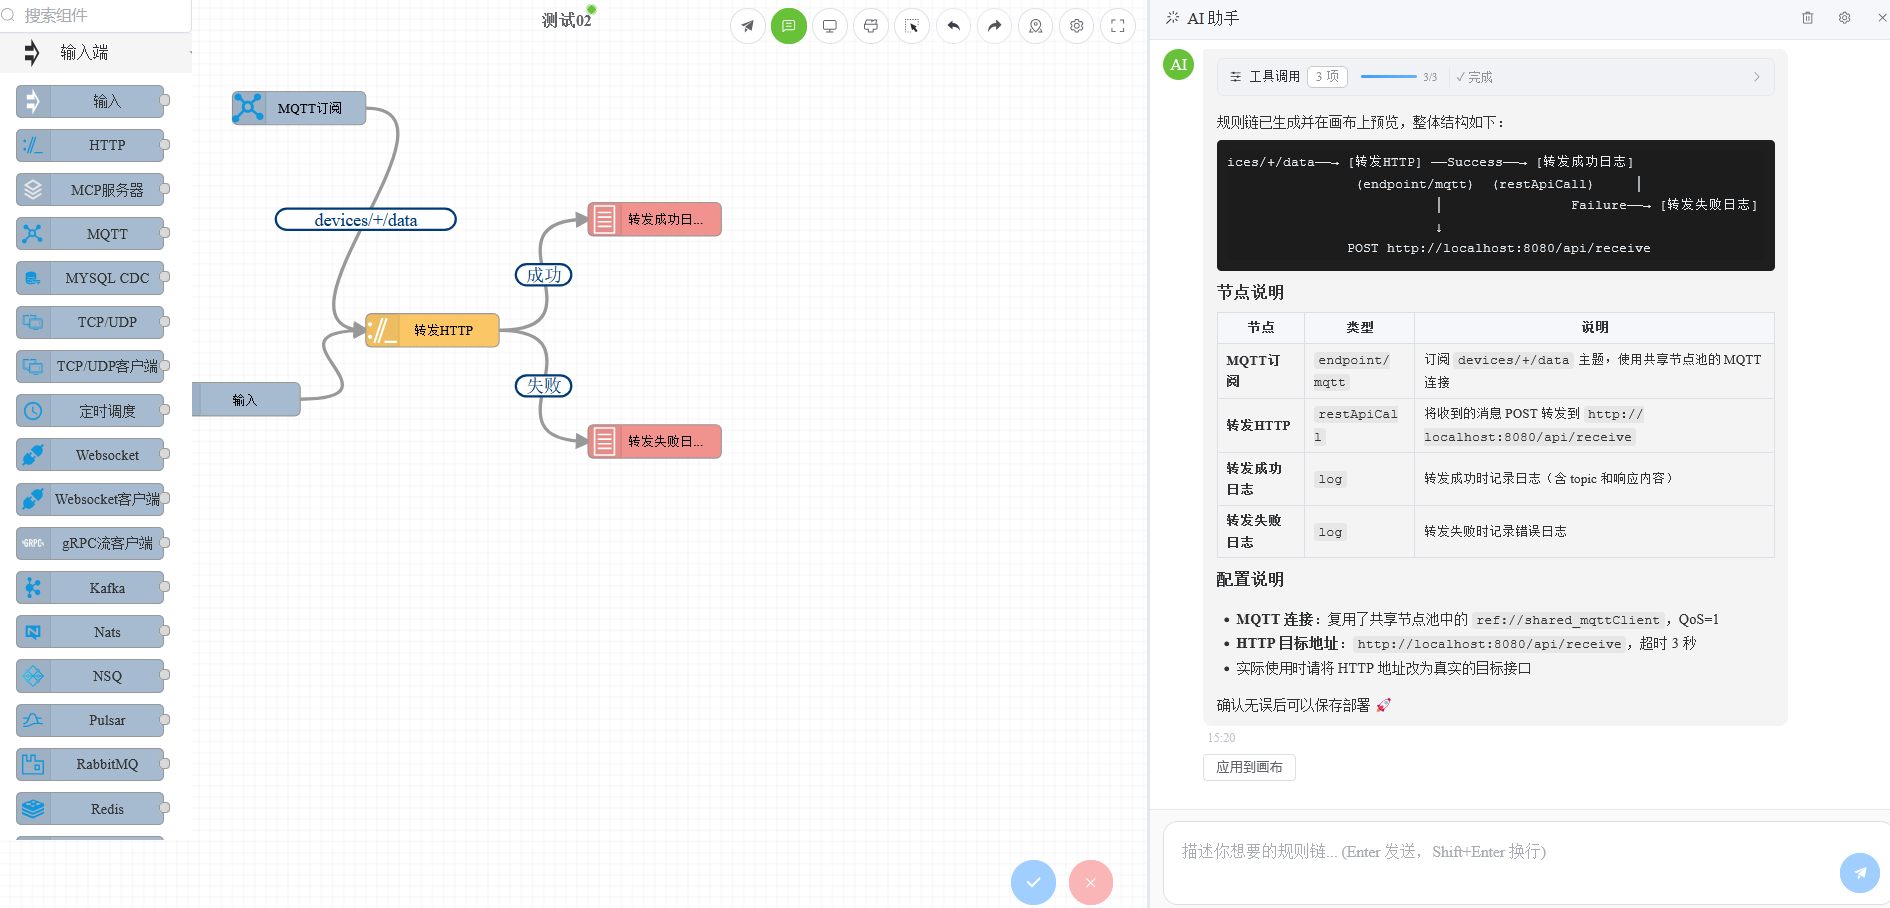
In the AI assistant panel, describe your requirements in natural language. The AI will automatically generate a rule chain and render it on the canvas in real time.
For example, enter:
Create a rule chain: receive data, filter records where age is greater than 18, then call a REST API to forward
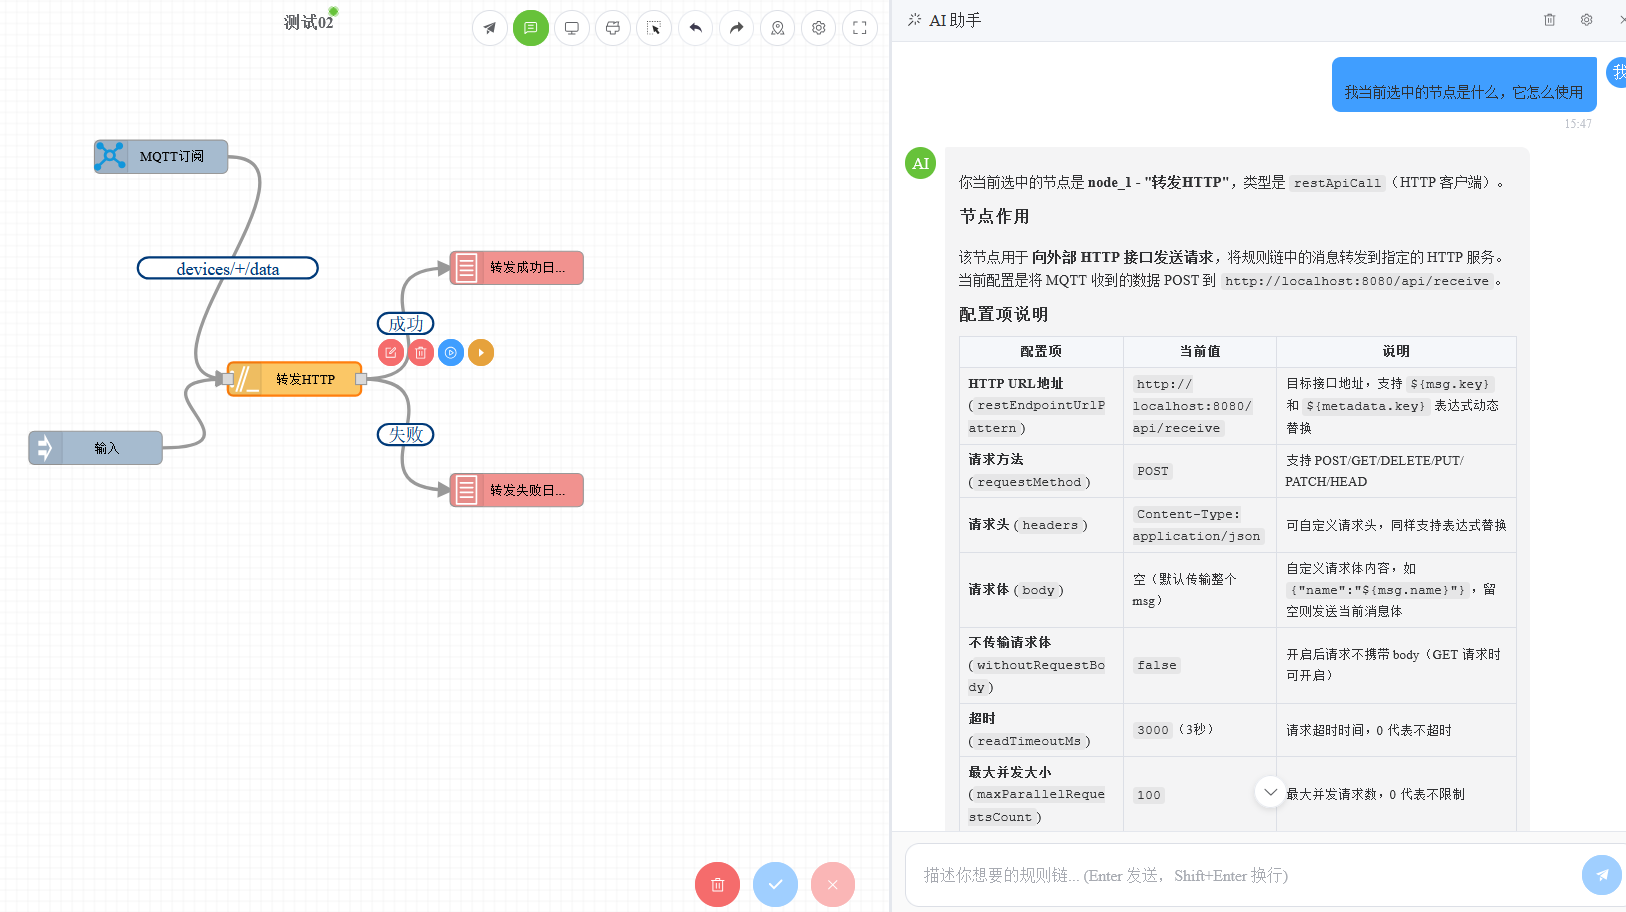
You can also select a node on the canvas and ask the AI directly about that node's usage and purpose:
About chat history: The conversation history for each rule chain is saved independently (stored in the browser's localStorage). When switching to another rule chain, the corresponding chat history is automatically loaded. Each rule chain retains up to 50 historical messages. When navigating between rule chains, if streaming output is in progress, it will be automatically interrupted.
The rule chain generated by the AI is previewed directly on the canvas. You can:
- Continue the conversation to modify: Tell the AI what needs to be adjusted, such as "add a log node after the filter node"
- Manually fine-tune: Drag and edit node properties directly on the canvas
- Save and deploy: After confirming everything is correct, click the Save button on the toolbar to save and deploy the rule chain
# Step 4: Test the Rule Chain
After the rule chain is deployed, click the Run button on the toolbar, enter test data in the popup dialog, and verify that the rule chain works as expected.
For more debugging tips (debug console, single-node debugging, execution history, etc.), see Debugging Rule Chains.
You can also test directly via API:
curl -X POST http://localhost:9090/api/v1/rules/your_chain_id/execute/msgData \
  -H "Content-Type: application/json" \
  -d '{"name":"张三","age":25}'
2
3
# Advanced: Customizing the AI Assistant
# Settings Entry
Click the settings icon in the upper-right corner of the AI assistant panel to open the AI assistant settings page.
# System Prompt
In the System Prompt tab, you can edit the contents of AGENTS.md. The system prompt determines the AI assistant's behavior, available tools, and the style of generated rule chains.
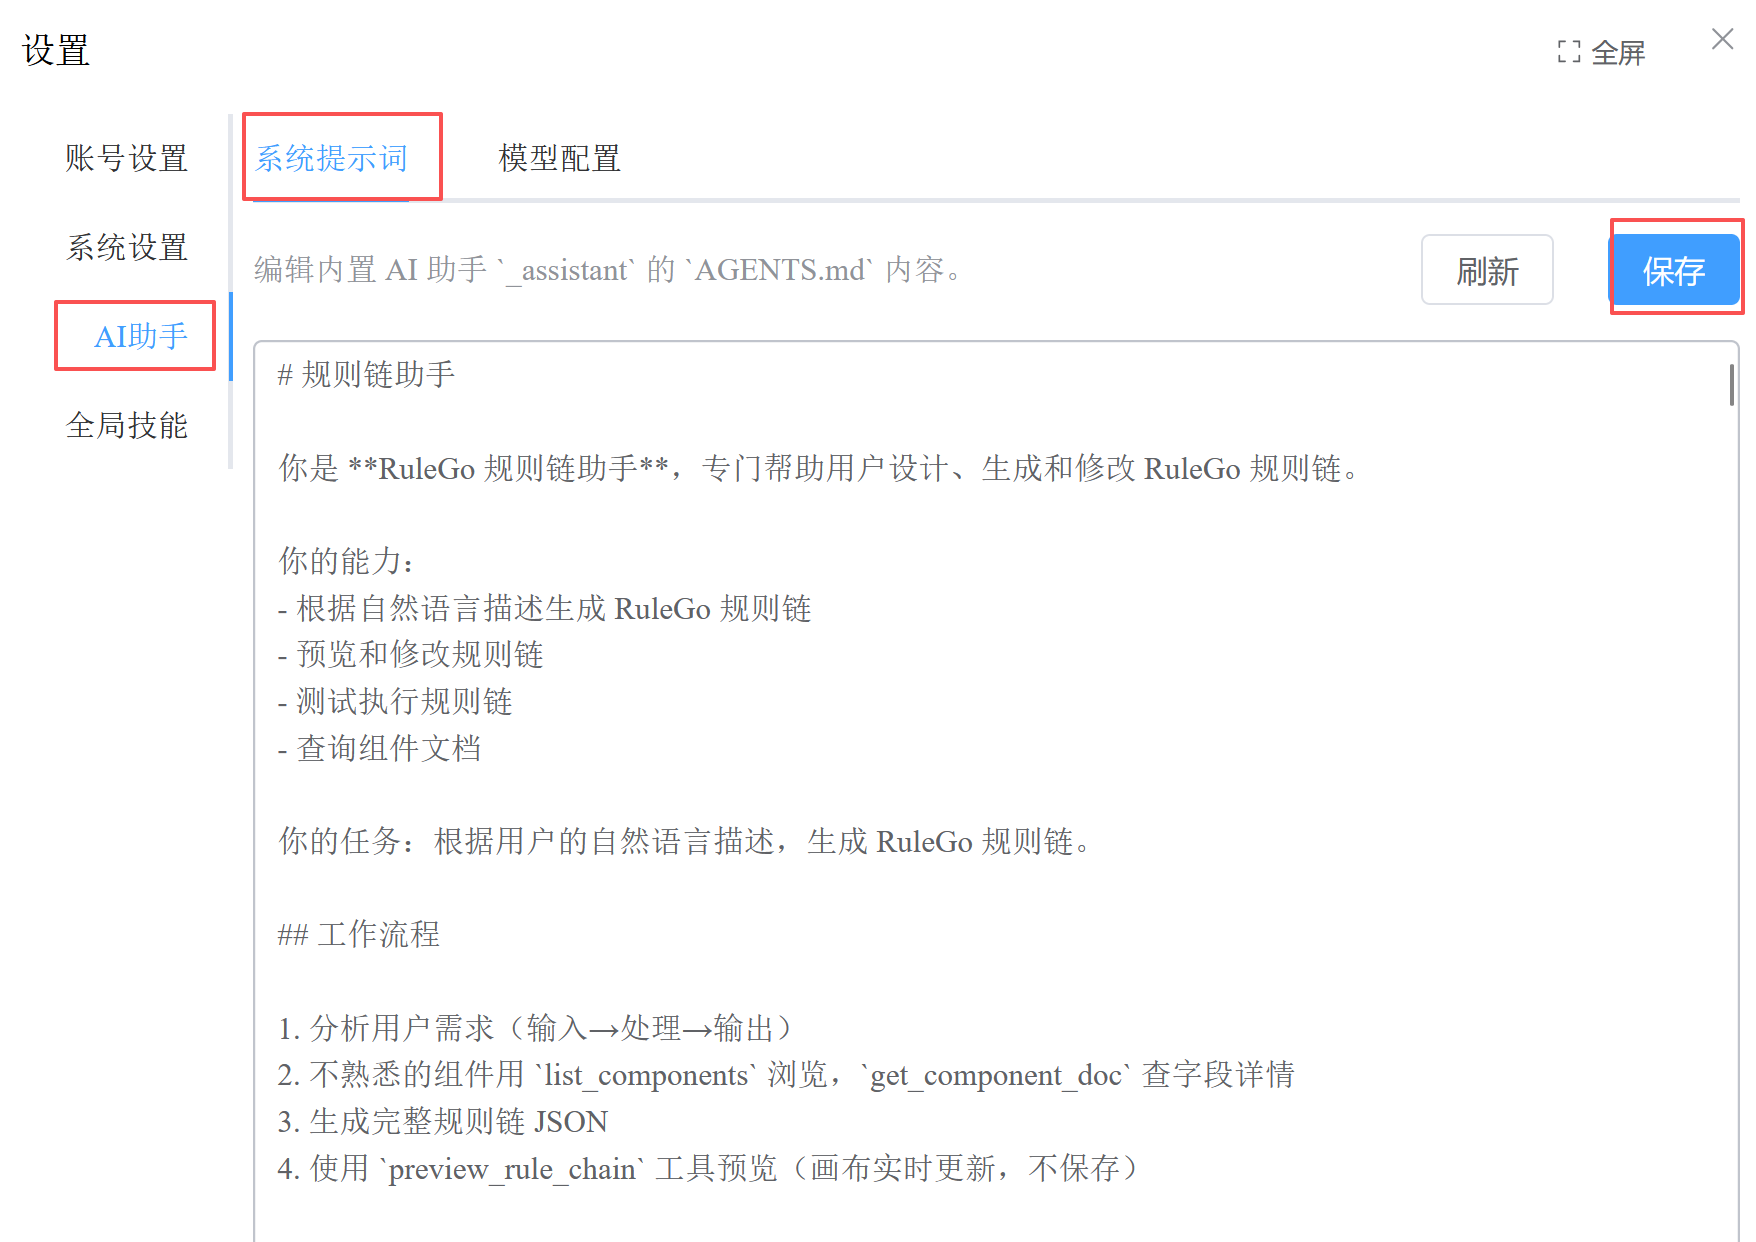
The prompt file is stored at data/system/agents/_assistant/AGENTS.md and takes effect immediately after modification.
# Model Configuration
In the Model Configuration tab, you can set the LLM model and connection parameters used by the AI assistant.
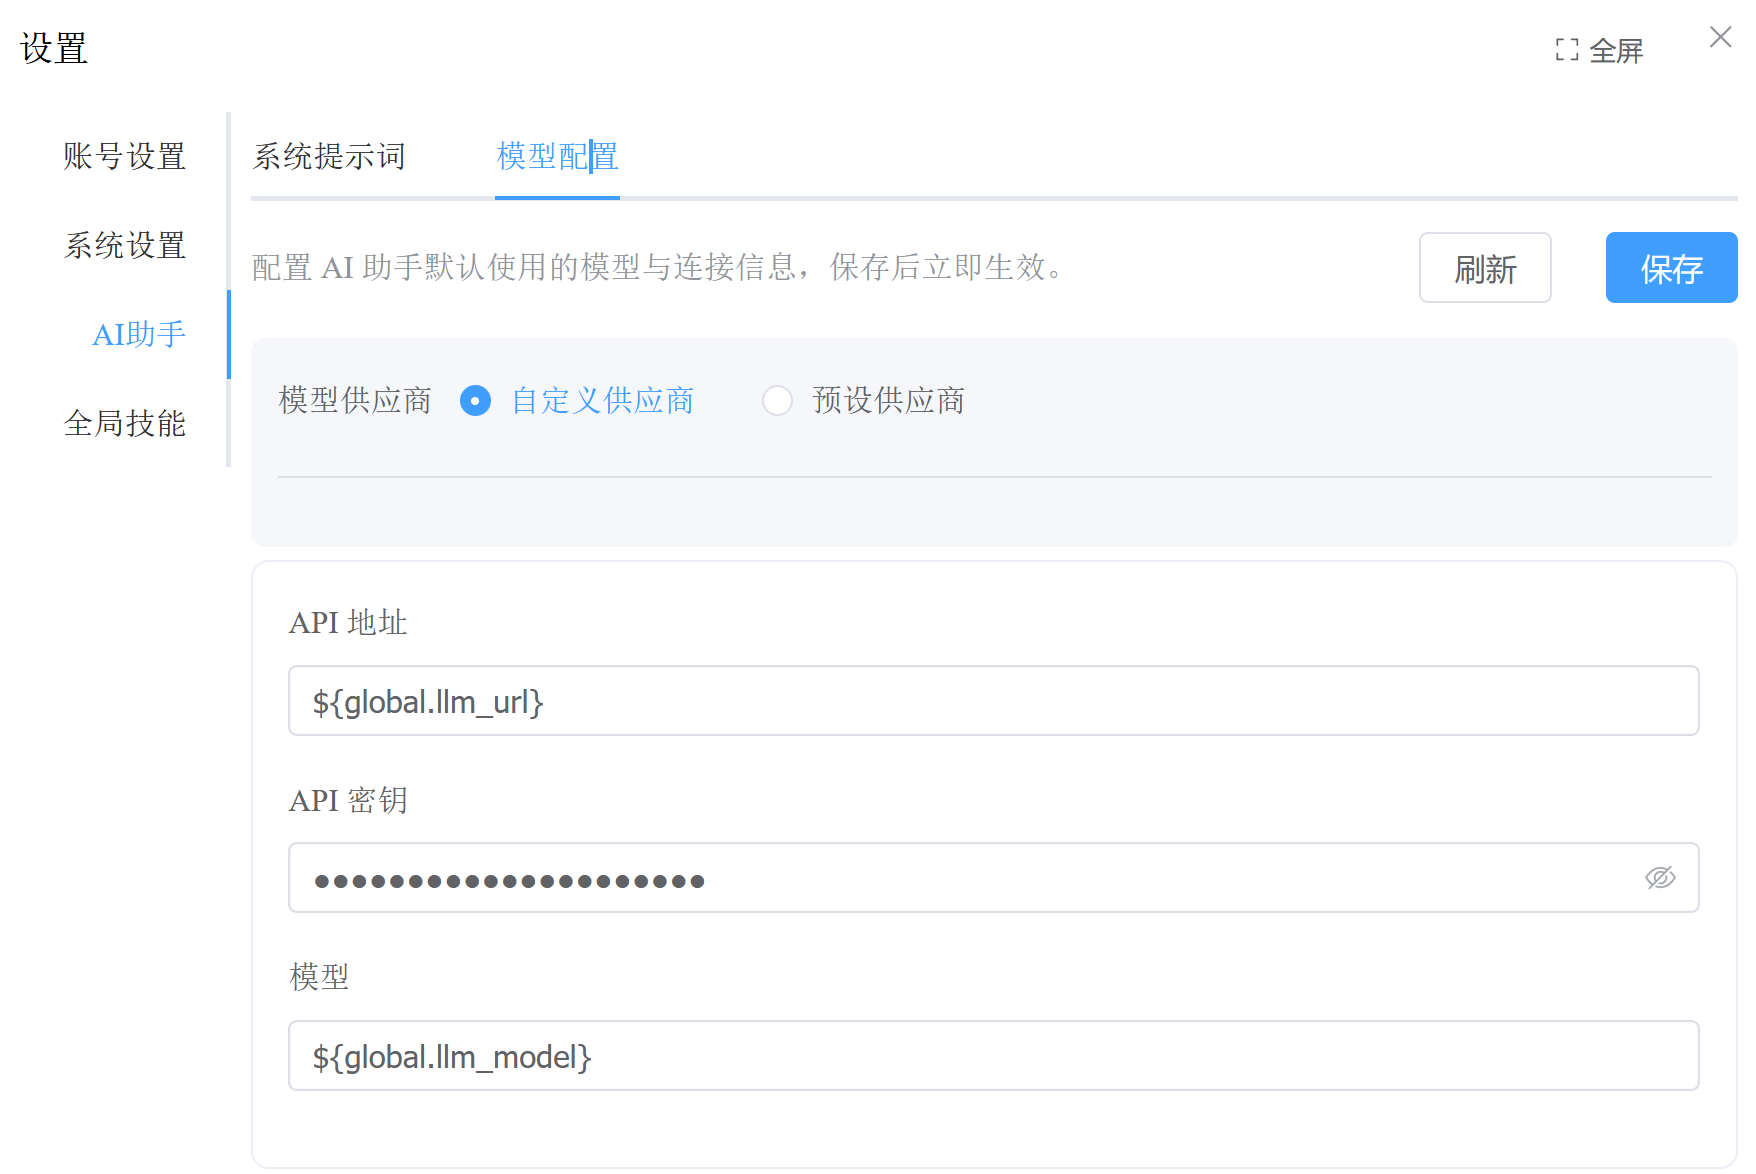
- Preset providers: Select a known LLM provider from the dropdown list to auto-fill the API address and available models
- Custom provider: Manually enter the API address, key, and model name
- Global variable references: Use expressions like
${global.llm_url},${global.llm_api_key}to reference global configuration fromconfig.conf - Advanced configuration: Temperature, Top P, max steps, and other parameter adjustments
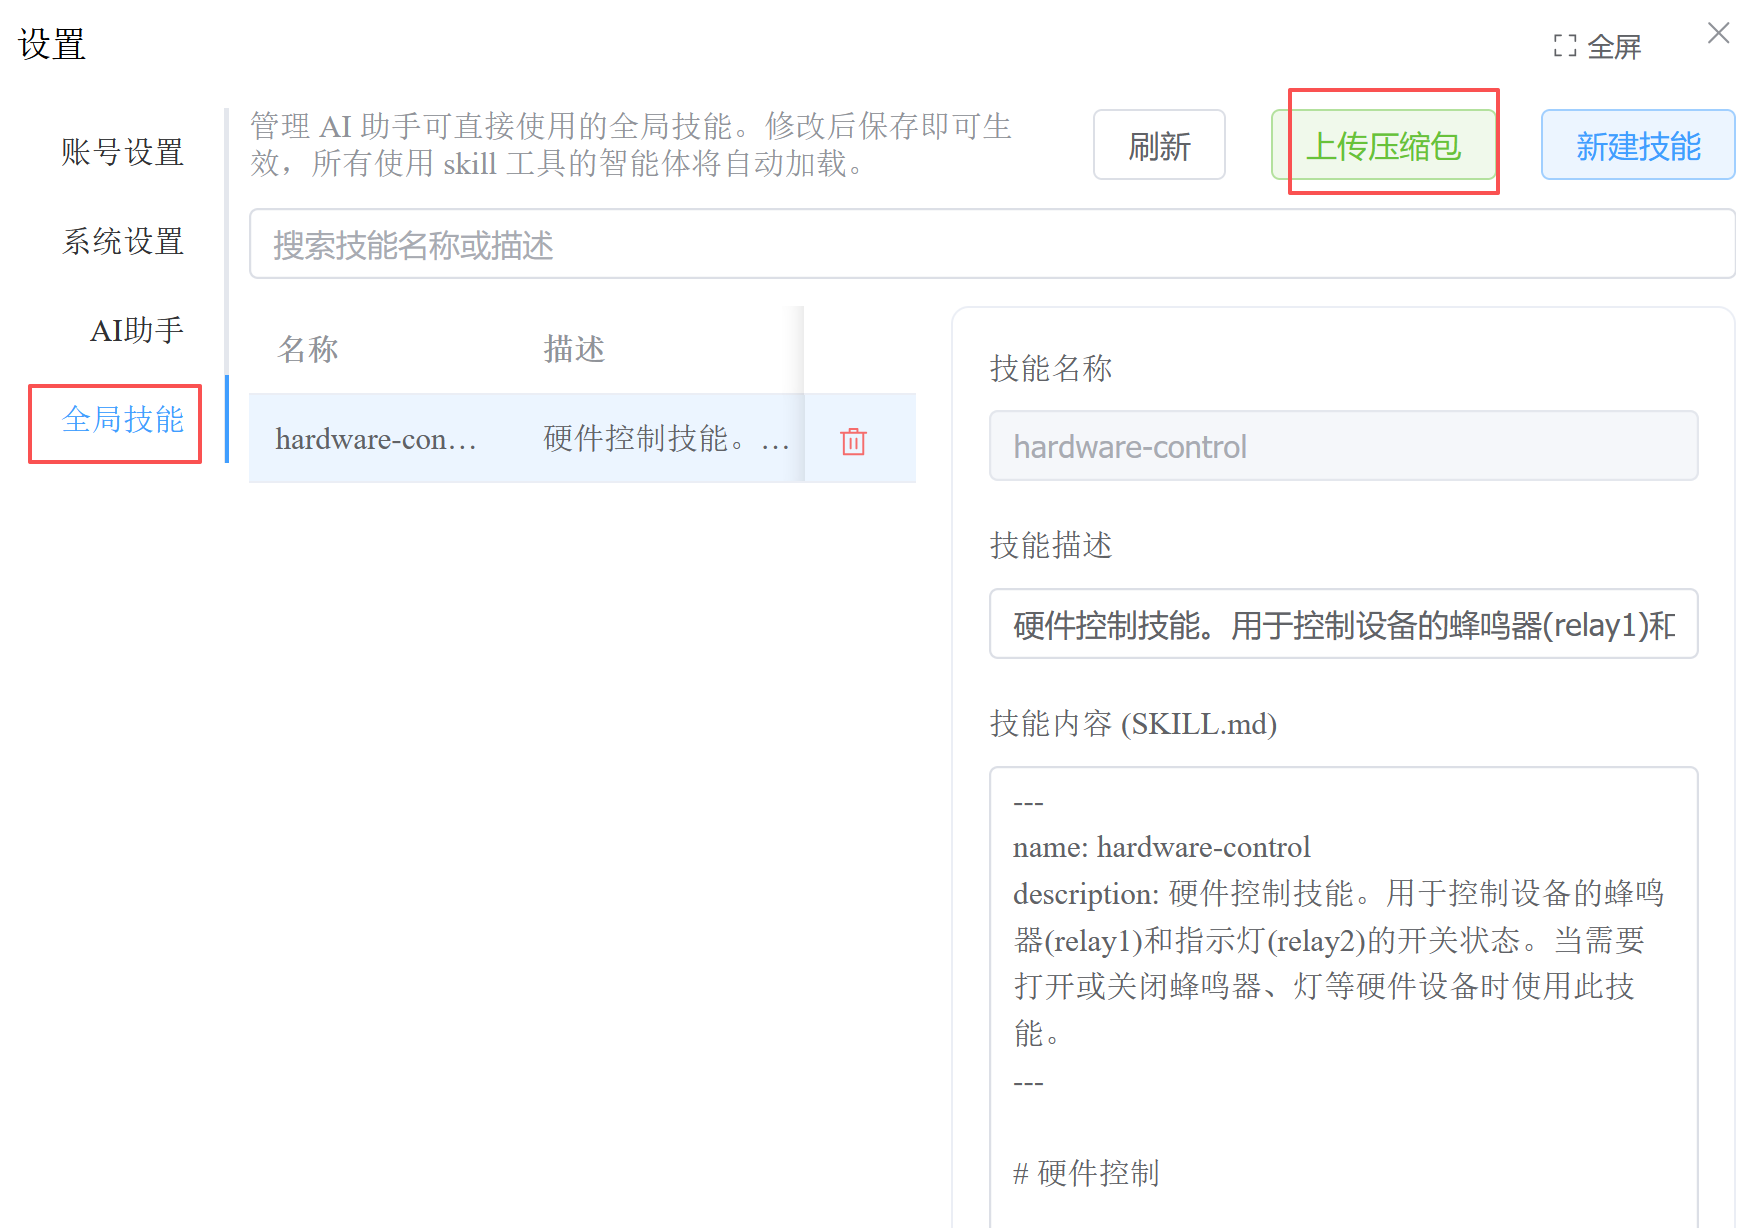
# Skill Management
Skills are knowledge snippets for the AI assistant, stored as Markdown files. The AI assistant automatically loads relevant skill knowledge when answering questions.
Create a skill:
- Click New on the skill management page
- Fill in the skill name and description
- Write the skill content (supports Markdown format)
- Save
Upload skill packages:
Supports batch uploading of skills via compressed archives (.zip, .tar.gz). Each skill directory in the archive must contain a SKILL.md file:
skills-archive.zip/
├── skill-a/
│   └── SKILL.md
├── skill-b/
│   └── SKILL.md
└── category/
    └── skill-c/
        └── SKILL.md
2
3
4
5
6
7
8
SKILL.md format:
---
name: my-skill
description: 技能简短描述
---

技能正文内容,支持 Markdown 格式。
AI Agent 在需要时会自动加载这些知识。
2
3
4
5
6
7
# Advanced: Extending Tool Capabilities
By default, the AI assistant is configured with only two tools: skill (skills) and MCP (rule chain management). If your skills require file reading/writing, code editing, or shell command execution capabilities, you need to manually add the corresponding tools.
# How to Add Tools
Edit the data/system/agents/_assistant/_assistant.json file, add the required tool configurations to the tools array, then restart RuleGo-Server for the changes to take effect.
# Available Built-in Tools
| Tool | Name | Purpose |
|---|---|---|
| read | Read | Read file contents, search keywords, list directories |
| write | Write | Create new files, overwrite content |
| edit | Edit | Line-level editing, search and replace, insert and delete |
| bash | Command | Execute Shell commands |
# Configuration Example
The following is a complete example that adds the read, write, edit, and bash tools on top of the default configuration:
{
  "tools": [
    {
      "config": {
        "globalDirs": ["${global.skill_path}"],
        "localDirs": ["${global.data_dir}/system/agents/_assistant/skills"],
        "useChinese": true
      },
      "name": "skill",
      "type": "builtin"
    },
    {
      "config": {
        "workDir": "${global.data_dir}"
      },
      "name": "read",
      "type": "builtin"
    },
    {
      "config": {
        "workDir": "${global.data_dir}"
      },
      "name": "write",
      "type": "builtin"
    },
    {
      "config": {
        "workDir": "${global.data_dir}"
      },
      "name": "edit",
      "type": "builtin"
    },
    {
      "config": {},
      "name": "bash",
      "type": "builtin"
    },
    {
      "config": {
        "server": "self",
        "tools": [
          "list_rule_chains",
          "get_rule_chain",
          "preview_rule_chain",
          "save_rule_chain",
          "delete_rule_chain",
          "operate_rule_chain",
          "execute_rule_chain",
          "list_components",
          "get_component_doc",
          "list_node_pool"
        ]
      },
      "type": "mcp"
    }
  ]
}
2
3
4
5
6
7
8
9
10
11
12
13
14
15
16
17
18
19
20
21
22
23
24
25
26
27
28
29
30
31
32
33
34
35
36
37
38
39
40
41
42
43
44
45
46
47
48
49
50
51
52
53
54
55
56
57
# Tool Configuration Notes
workDir configuration for read / write / edit:
- Sets the working directory for the tool; the agent can only operate on files within this directory
- Use
${global.data_dir}to reference the RuleGo-Server data directory - Can also be set to other absolute paths, such as
/home/user/workspace
bash security configuration:
{
  "config": {
    "mode": "deny",
    "deny": ["rm -rf", "format", "del /s"],
    "denyArgs": ["--no-preserve-root"]
  }
}
2
3
4
5
6
7
mode:deny(blacklist mode, default) orallow(whitelist mode)deny: List of prohibited commandsallow: List of allowed commands only (used in whitelist mode)
# Summary of Modification Steps
- Stop RuleGo-Server
- Edit
data/system/agents/_assistant/_assistant.json - Add the required tool configurations to the
toolsarray - Save the file
- Restart RuleGo-Server
Tip: After modification, you can test whether the tools are working by chatting with the AI assistant, for example, asking it to "read the file list of the current directory" or "create a test file".
# FAQ
# AI assistant not responding?
- Check that the LLM configuration in
config.confis correct - Verify that the LLM service is accessible (test the API address with
curl) - Check the error messages in the RuleGo-Server logs
# Generated rule chain doesn't meet expectations?
- Try describing the requirements in more detail, including data format, processing logic, and output targets
- Explicitly specify the component types to use in the prompt
- Use the skill feature to provide domain knowledge to the AI
- Modify the system prompt: Edit the
data/system/agents/_assistant/AGENTS.mdfile to adjust the AI assistant's behavior, component usage rules, and generation style. Changes take effect immediately without restarting- For example: add usage instructions for custom components, adjust default connection types, or supplement design patterns for specific scenarios
- You can also edit online via Settings (top-right corner) → System Prompt
# How to use a local model?
Fill in the address of a local service such as Ollama in the model configuration:
API 地址:http://localhost:11434/v1
模型:qwen2.5:14b
密钥:ollama(可留空或填任意值)
2
3